Software development depends on precise communication. A vague message such as “the settings page is broken” can create a long back-and-forth between developers, QA testers, designers, product managers, and support teams. A well-made screenshot with numbered steps can reduce that ambiguity in seconds.
This numbered screenshot maker guide for software developers explains how to create screenshots that communicate bugs, UI changes, reproduction steps, and feedback clearly. Whether you are documenting a regression, reviewing a pull request, preparing a release note, or writing internal documentation, numbered annotations make the next action obvious.
The goal is not simply to capture what is on your screen. The goal is to create a visual explanation that another person can understand without needing to ask, “What am I supposed to look at?”
Why Numbered Screenshots Matter in Development Workflows
Development teams work across different roles, time zones, and levels of product knowledge. The engineer who built a feature may immediately recognize a broken state, but a QA teammate or designer may need more context. Numbered screenshot annotations create a shared visual language.
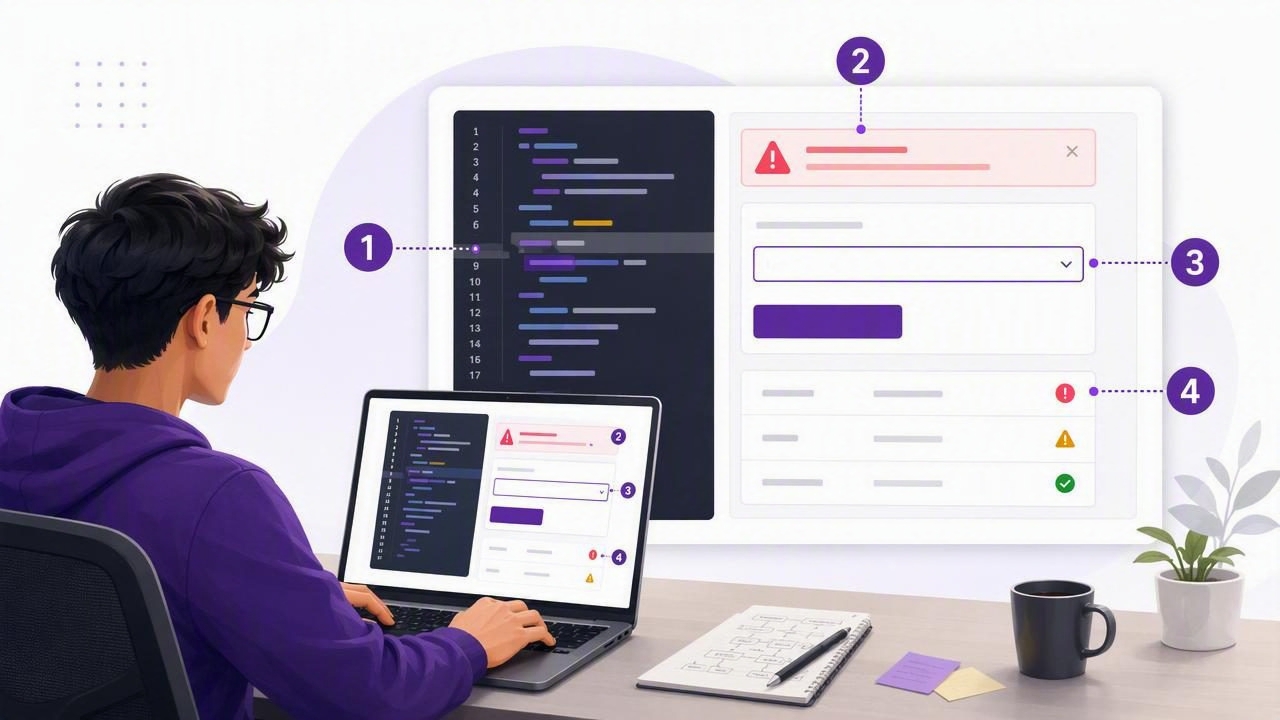
Instead of relying on a dense paragraph, you can label each relevant part of the interface:
- 1: The action a user takes.
- 2: The unexpected UI state or error.
- 3: The expected behavior or intended design.
- 4: Supporting evidence, such as a status indicator or validation message.
This format is especially useful in bug trackers, async standups, pull request discussions, release checklists, customer support escalations, and onboarding documentation. A numbered screenshot is fast to scan and easy to reference in a written comment.
“See marker 2” is more actionable than “the thing near the middle is not aligned correctly.”
Common Developer Use Cases for Numbered Screenshot Annotations
A numbered screenshot maker is useful far beyond formal bug reporting. The best workflow depends on the type of communication you need to create.
Bug Reports and Regression Tickets
Bug reports become easier to triage when the visual evidence identifies the trigger, the affected component, and the result. For example, a screenshot of a checkout page may include a numbered marker on the coupon field, another on the submit button, and a third on the error message that appears afterward.
Pair the screenshot with concise reproduction steps:
- Enter a valid coupon code in the field marked 1.
- Select the button marked 2.
- Observe the incorrect validation message marked 3.
This removes guesswork and helps the assigned developer verify the issue faster.
UI Review and Design Feedback
Design feedback often becomes subjective when it is expressed only in prose. Numbered markers help reviewers distinguish cosmetic changes from functional blockers. Use arrows for directional feedback, shapes to frame related UI elements, and number labels to connect the image with an ordered list of comments.
For example, a reviewer can label a navigation item, a spacing issue, and a color contrast problem separately. This is much clearer than sending multiple uncropped screenshots or describing positions relative to an ever-changing layout.
Technical Documentation and Tutorials
Developer documentation needs to show readers where to click, what to configure, and what success looks like. Numbered screenshots are ideal for setup guides, admin dashboards, internal tools, API portal walkthroughs, and QA procedures.
For tutorials, each marker should match a written instruction exactly. If the text says “Select the Deployments tab,” the marker should point directly to that tab rather than to the whole navigation bar.
Code Review and Pull Request Feedback
Not all code review feedback belongs in a diff. Visual changes often require screenshots, especially for responsive components, animation states, empty states, and accessibility improvements. A numbered screenshot can identify what changed and why.
Use this approach when reviewing:
- Component spacing, alignment, and visual hierarchy.
- Desktop versus mobile layouts.
- Error, loading, disabled, and success states.
- Regression fixes that need visual proof.
- Feature flags or configuration-dependent UI states.
How to Create a Clear Numbered Screenshot
The strongest screenshots are intentional. They include enough context to establish meaning, but not so much that the key detail gets lost.
1. Capture Only the Necessary Context
Start with a region capture whenever possible. Cropping to the relevant browser window, modal, component, or application panel helps the reader focus. Full-screen capture is useful when the issue involves multiple applications, display layout, browser chrome, or system-level behavior.
Before capturing, remove unrelated windows, notifications, chat messages, and personal data. A smaller, focused screenshot is more professional and usually easier to annotate.
2. Add Markers in Reading Order
Use numbered markers in a natural sequence: top to bottom and left to right for most English-language interfaces. If the user must complete actions in a different order, make that order obvious through the numbers and the written instructions.
Avoid reusing the same number for separate elements. Even if two controls look related, unique markers prevent confusion during discussion.
3. Use Arrows and Shapes Sparingly
Numbered steps identify which elements matter; arrows and shapes explain where the reader should look. Use an arrow when the target is small or difficult to see. Use a rectangle or circle to group an area, such as an entire card, modal, or toolbar.
Too many arrows, boxes, and colors can create a screenshot that feels as cluttered as the original problem. One annotation style per purpose is usually enough.
4. Blur Sensitive Information Before Sharing
Development screenshots can accidentally expose private information. Before attaching an image to a ticket or sending it to a client, inspect it for:
- API keys, bearer tokens, session cookies, and environment variables.
- Customer names, email addresses, phone numbers, and account IDs.
- Internal URLs, staging credentials, and repository details.
- Personal messages, calendar alerts, and browser tabs.
Blur sensitive regions instead of relying on a low-resolution image or a dark overlay. A proper blur is more reliable and preserves the rest of the visual context.
5. Add a Short Text Label When Needed
Numbers work best with accompanying text. Add a small label only when the screenshot needs context that a marker cannot convey, such as “expected state,” “production only,” or “appears after refresh.” Keep labels short enough that they do not cover important UI.
A Practical Bug Report Template
Use the following structure with a numbered screenshot to make bug reports easier to reproduce and prioritize:
Title: Save button remains disabled after valid form input

Environment:
- macOS and browser version
- App version or commit SHA
- Staging, preview, or production

Steps to reproduce:
1. Enter valid data in the field marked 1.
2. Select the dropdown marked 2.
3. Choose any available option.
4. Observe the Save button marked 3.

Actual result:
The Save button remains disabled.

Expected result:
The button should become enabled once required fields are valid.

Attachments:
Annotated screenshot and relevant console output.
The screenshot does not replace written reproduction steps, but it makes the report significantly easier to understand. It also helps confirm that everyone is looking at the same interface state.
Annotation Best Practices for Readable Screenshots
Consistency matters when a team creates many screenshots. Consider defining a lightweight annotation convention for QA, engineering, and product teams.
| Annotation | Best Use | Example |
|---|---|---|
| Numbered marker | Ordered actions or discussion points | Steps to reproduce a checkout error |
| Arrow | Small, distant, or visually subtle target | A missing icon in a toolbar |
| Rectangle or circle | Grouping an affected region | A misaligned pricing card |
| Blur | Protecting private or confidential data | Email addresses or access tokens |
| Text label | Clarifying state or expectation | “Expected on mobile” |
Choose high-contrast annotation colors that remain visible against both light and dark interfaces. Keep marker sizes consistent, and avoid placing labels directly over buttons, error text, or code that readers need to inspect.
How to Share Annotated Screenshots Safely
After annotation, choose a sharing method that matches the sensitivity of the information. A screenshot for an open-source issue may be appropriate for a public repository, while a screenshot containing customer data should remain in an approved internal system.
For everyday work, common destinations include issue trackers, team chat, email, pull request comments, documentation platforms, and project management tools. Copying an annotated screenshot directly to the clipboard can be the fastest option when a discussion is happening in real time. Saving a file is better when you need an audit trail or want to add the image to documentation.
For privacy-conscious teams, consider tools that keep captures local by default and only upload images when you explicitly choose to share them. This avoids treating every screenshot as cloud content automatically.
Choosing a Numbered Screenshot Tool for Mac Development
When evaluating a Mac screenshot app, look beyond basic capture shortcuts. A productive developer workflow should support fast region and full-display capture, editable annotations, arrows, shapes, text, blur, and numbered step markers before export.
Also consider whether the tool supports direct copy and drag-and-drop, local screenshot history, predictable file handling, and optional sharing rather than mandatory uploads. These details matter when you create screenshots several times a day.
If you prefer a focused, local-first workflow with numbered markers and optional Google Drive sharing, Snip Halo is one option designed for macOS screenshot annotation without background recording or automatic uploads.
Make Every Screenshot Easier to Act On
A good screenshot is evidence. A great numbered screenshot is evidence with direction. It tells the viewer what happened, where it happened, and what they should inspect next.
By capturing only the relevant area, adding markers in a logical order, blurring confidential details, and pairing the image with concise written steps, software developers can reduce clarification cycles across the entire product process. The result is faster bug triage, clearer reviews, stronger tutorials, and more useful visual feedback.
