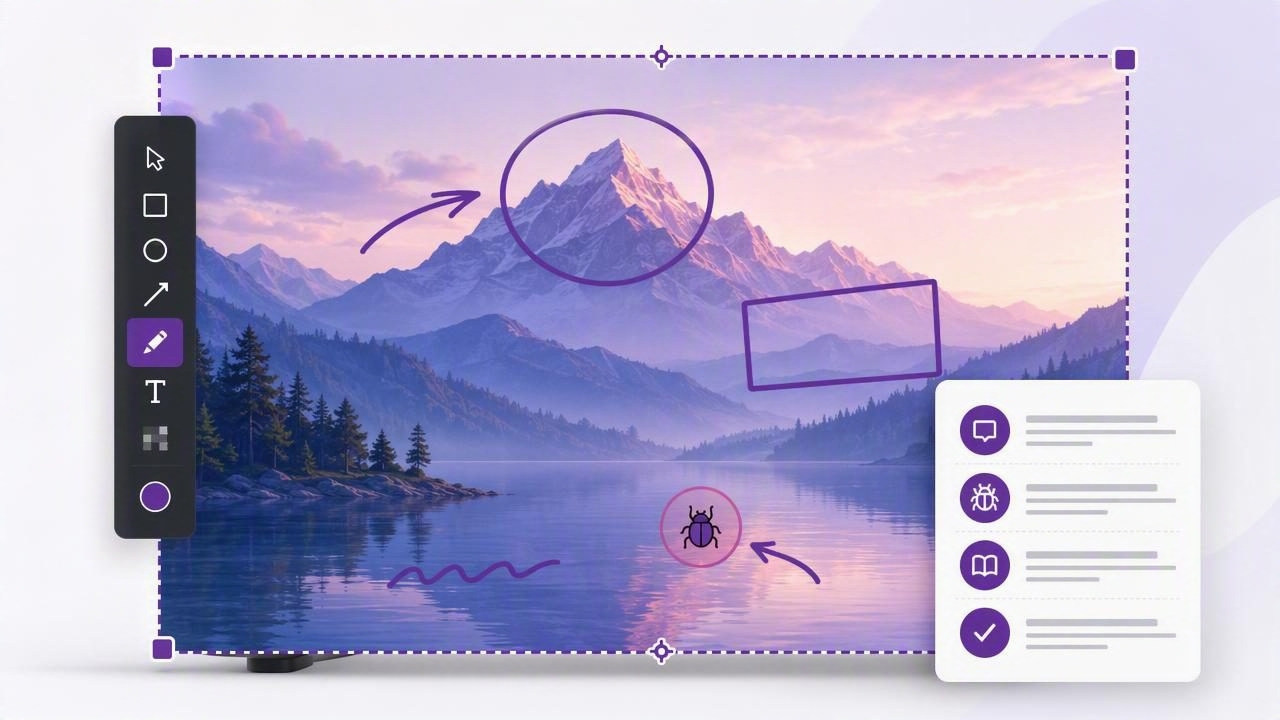
A full screen capture tool for simpler screenshot markup can make everyday communication much clearer. Whether you are reporting a software bug, documenting a workflow, reviewing a design, or helping a colleague find a setting, a full-display screenshot provides the context that a tightly cropped image can miss.
Still, capturing the entire screen is only useful when the markup stays clean. An image covered in oversized arrows, unnecessary boxes, and lengthy notes can be harder to understand than no annotation at all. The goal is not to decorate screenshots. It is to direct attention quickly, preserve useful context, and make the next action obvious.
This guide explains when full-screen capture works best, how it compares with region capture, and how to create faster, more readable screenshot markup on a Mac.
Why Full-Screen Capture Is Useful
Region capture is ideal when one small interface element tells the whole story. For example, a cropped image of a button, error message, or form field is often enough for a focused instruction. But many real-world questions involve the surrounding interface.
A full-screen image can show:
- Which application, browser tab, or project is open
- The current screen layout and navigation path
- How a dialog box relates to the page behind it
- Multiple panels, windows, or monitors in a workflow
- The visual state that led to an error or unexpected result
That context is especially valuable in bug reports and visual feedback. A developer may need to see a browser’s address bar, the selected sidebar item, an open menu, and an error toast together. A cropped screenshot can remove the clue that explains the issue.
Full-screen capture is also useful for tutorials. If a reader needs to navigate from a dashboard to a settings page, showing the full interface can help them build confidence. They can compare their screen with yours instead of guessing where a missing control might be located.
Built-In Mac Full-Screen Screenshot Options
macOS includes practical screenshot shortcuts, so you can capture a display without installing anything. The most common options are:
- Command + Shift + 3: Capture the entire screen.
- Command + Shift + 4: Select a custom region to capture.
- Command + Shift + 5: Open the Screenshot toolbar, where you can select a full screen, window, region, or recording option.
- Control + Command + Shift + 3: Copy a full-screen capture directly to the clipboard instead of saving a file first.
These shortcuts are excellent for quick capture. However, the workflow can become slower when you need to annotate repeatedly. You may have to open the preview, add a markup element, save the image, find it in a folder, and then attach it to a message or task. For occasional screenshots, that is fine. For regular documentation, support, QA, or design review, a dedicated screenshot workflow can reduce friction.
Full Screen Capture vs. Region Capture
Neither method is universally better. The right choice depends on how much context the viewer needs before they can understand the action.
| Use case | Best capture type | Why |
|---|---|---|
| Pointing out one form field | Region capture | Removes distractions and keeps the file compact. |
| Reporting a complex app issue | Full-screen capture | Shows the surrounding state, navigation, and open windows. |
| Creating a step-by-step guide | Both | Use full screens for orientation and crops for detailed actions. |
| Reviewing a page layout | Full-screen capture | Preserves spacing, hierarchy, and page-level context. |
| Sharing an error message | Region capture | Usually enough when the message is self-explanatory. |
A useful rule is simple: capture the smallest area that retains the information needed to make a decision. If a close crop causes follow-up questions, expand to a full-display image. If a full-screen image forces people to hunt for the relevant item, crop it or annotate it more clearly.
The Essentials of Simpler Screenshot Markup
Effective screenshot annotation should reduce cognitive load. Someone should be able to open the image, locate the important area, and understand the intended action within a few seconds. The best markup is deliberate, minimal, and consistent.
Use arrows for direction
Arrows are best when the reader needs to identify one exact control. Point the arrowhead at the item, not near it. Avoid long diagonal arrows crossing large sections of the screen; they can obscure details and create visual clutter.
For example, in a full-screen capture of a project-management app, a single arrow can point to the “Export” option in the top-right menu. A short text label such as Choose Export can reinforce the instruction without requiring a long paragraph.
Use shapes for grouping
Rectangles and circles work well when an area, rather than a single pixel-perfect target, matters. A rectangle can identify a settings panel, a group of filters, or a section of a dashboard. Use a border or light translucent fill where possible so the underlying interface remains visible.
Do not draw a box around every important element. If everything is highlighted, nothing is prioritized. Usually, one to three visual markers are enough for a single screenshot.
Use text labels sparingly
Text is useful for clarifying an action that an arrow alone cannot explain. Keep labels short and action-oriented:
- Enable this option
- Paste the token here
- This value should be 0
- Expected result
Long paragraphs belong in the accompanying email, support ticket, or documentation page. The screenshot should act as visual evidence, not a replacement for structured writing.
Blur private or irrelevant information
Full-screen screenshots can accidentally include customer names, email addresses, access tokens, internal documents, browser bookmarks, or personal messages. Before sharing, inspect the entire image—not only the section you annotated.
Blur is useful for protecting sensitive content while preserving the layout and context of the screen. It is generally better than covering an area with an opaque box when the viewer still needs to understand where information appeared. However, if a secret must be completely unrecoverable, make sure the original image is not shared and verify that the blur cannot be removed by your chosen workflow.
Use Numbered Steps for Multi-Action Instructions
Numbered step markers are particularly helpful when a full-screen screenshot contains a sequence of actions. Rather than sending several nearly identical captures, you can sometimes use one well-marked image with a short ordered list.
- Open the settings menu in the sidebar.
- Select the integration section.
- Turn on the required permission.
- Save the changes before leaving the page.
The visual markers should match the written instructions exactly. If the screenshot has markers 1, 2, and 3, the surrounding text should use the same order. This removes ambiguity and makes tutorials easier to scan.
Tip: Use one screenshot per meaningful decision point. If the screen changes substantially after a click, capture the next state instead of trying to explain multiple screen states in one image.
A Faster Full-Screen Screenshot Workflow
A repeatable workflow matters more than any individual annotation feature. The following process works well for bug reports, feedback, and internal documentation:
- Prepare the screen. Close unrelated windows, hide notifications, and reproduce the exact state you want to explain.
- Capture the full display. Use full-screen capture when the broader interface adds useful context.
- Scan for sensitive details. Blur names, account details, tokens, personal messages, or confidential records.
- Mark the primary action. Start with one arrow, shape, or numbered marker.
- Add only essential labels. Keep labels short enough to read at a glance.
- Choose the fastest delivery method. Copy to the clipboard for chat, drag into a ticket, save locally for records, or use an approved sharing process.
This approach prevents a common problem: spending more time explaining the screenshot than solving the issue. A good image should support the message, not become a separate project.
Privacy Considerations for Screenshot Tools
Screenshots often contain more information than people expect. That makes privacy an important criterion when comparing screenshot apps. Consider where captures are stored, whether images are uploaded automatically, how long history is retained, and whether sharing links are created by default.
For teams handling client data, internal systems, or unreleased work, a local-first workflow is often easier to assess. Captures remain on the Mac unless the user explicitly copies, exports, or shares them. Optional cloud sharing can still be convenient, but it should be a conscious choice rather than an invisible background behavior.
Also consider the practical side of screenshot history. Recent captures can be valuable when you need to retrieve an image quickly, but history should be easy to review and clear when needed.
Choosing a Screenshot App for Full-Screen Markup
When evaluating a Mac screenshot app, focus less on feature count and more on the path from capture to communication. Tools such as CleanShot X, Shottr, Xnapper, Snagit, Dropshare, and Monosnap serve different workflows. Some emphasize polished presentation, others scrolling captures, cloud delivery, recording, automation, or broader media features.
If your primary need is simpler screenshot markup, look for these essentials:
- Fast region and full-screen capture
- Easy arrows, shapes, text, blur, and numbered markers
- Clipboard copying and drag-and-drop output
- Local storage controls and transparent sharing behavior
- A lightweight interface that does not interrupt your work
- Pricing that fits how often you use the tool
For people who prefer one-time Mac software with local captures by default and optional Google Drive sharing, Snip Halo is one focused option worth considering.
Make Every Screenshot Easier to Understand
A full-screen capture is not automatically clearer than a crop. Its value comes from preserving the right context and then guiding the viewer with restrained annotation. Use arrows to point, shapes to group, blur to protect, and numbered markers to sequence actions.
With a consistent workflow, full-screen screenshots become more than static images. They become concise visual instructions that speed up bug reporting, improve tutorials, reduce feedback loops, and help people act with confidence.
