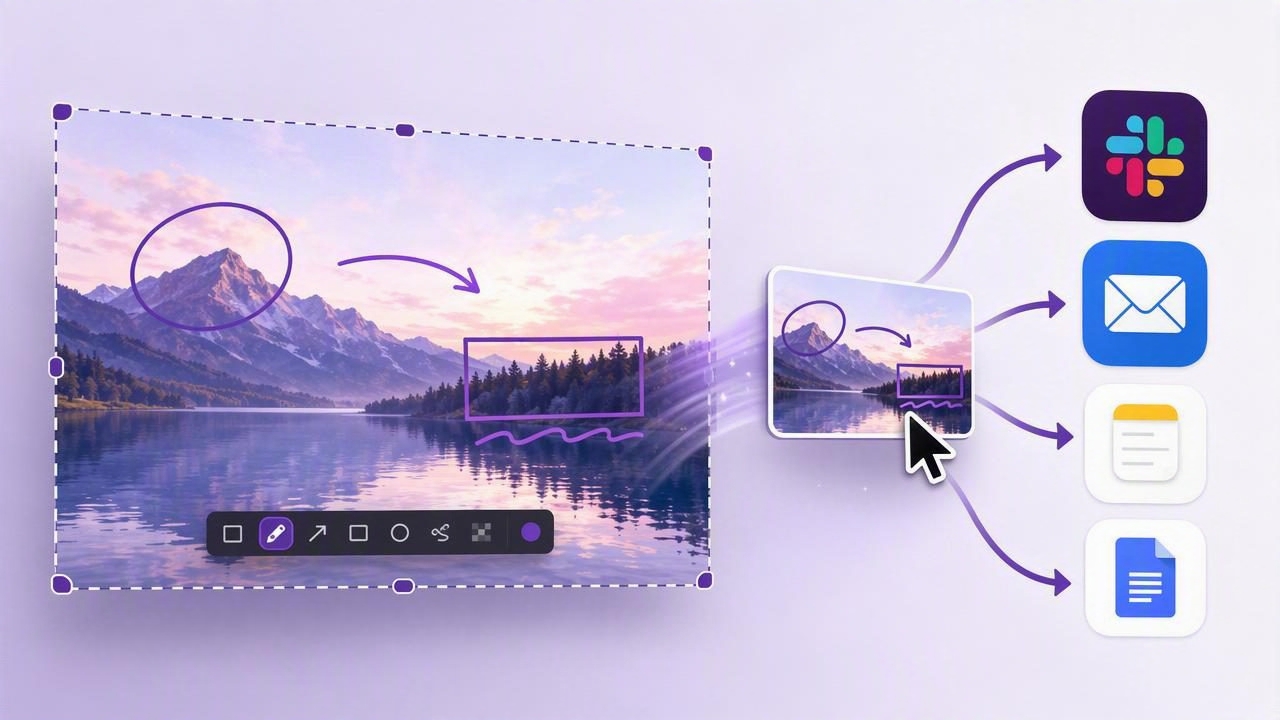
When a screenshot needs to explain a bug, answer a client question, document a process, or provide design feedback, saving it to a folder first can feel unnecessarily slow. A better workflow is to drag a screenshot into another app with full screen capture tool support, placing the finished image directly into Slack, Messages, Mail, Notion, a browser upload field, or a project-management task.
This approach reduces file clutter, avoids repeated Finder searches, and keeps visual communication moving. Instead of capturing an image, locating it, opening another app, attaching it, and then explaining what people should notice, you can capture, annotate, and deliver the screenshot in one short sequence.
This guide explains how drag-and-drop screenshot workflows work on Mac, when full-screen capture is useful, how to annotate before sharing, and how to make sure screenshots remain clear, secure, and useful to the person receiving them.
Why Drag-and-Drop Screenshots Are Faster
The default macOS screenshot tools are useful for quick captures, but their output often starts as a desktop file. That is fine for archival work, yet it adds friction when the screenshot is only needed in a conversation or task.
Dragging a completed screenshot directly into another application removes several common steps:
- Finding the image file after capture
- Renaming temporary screenshots you will not keep
- Opening an attachment picker or upload dialog
- Choosing the wrong similarly named screenshot
- Leaving sensitive or outdated images on the desktop
For teams that rely on visual feedback, these small delays add up. A product manager can drag a marked-up interface into a ticket. A support specialist can add a screenshot to an email reply. A technical writer can place a captured dialog directly into a draft. The process is especially valuable when the screenshot needs quick annotations before it is shared.
When to Use Full-Screen Capture Instead of Region Capture
Region capture is ideal when only one panel, error message, or UI component matters. Full-screen capture is better when context changes the meaning of what someone sees. It can show the active application, browser tabs, navigation state, multiple windows, or the relationship between two parts of an interface.
Use a full-screen capture tool when you need to show:
- A bug that appears only within a larger page or window
- A comparison between two applications or browser windows
- A complete dashboard, analytics view, or settings screen
- Instructions that involve the menu bar, Dock, or app navigation
- A multi-window layout that helps another person reproduce an issue
However, full-screen screenshots can include more information than intended. Before sharing, check for visible notifications, account names, client data, open tabs, private messages, access tokens, or calendar details. A good screenshot workflow includes annotation tools such as blur, shapes, and cropping so the image can be informative without exposing unnecessary information.
A Simple Drag-and-Drop Screenshot Workflow
The exact interface differs across screenshot apps, but the most efficient workflow follows the same basic pattern. Capture the screen, make the important detail obvious, then drag the image from a preview window or history panel into the destination app.
- Prepare the screen. Close unrelated windows, pause notifications if needed, and position the interface at a readable size.
- Choose full-screen capture. Capture the display when the surrounding interface provides useful context.
- Review the image immediately. Use the floating preview or editor to confirm that the right display and state were captured.
- Annotate the screenshot. Add arrows, boxes, text labels, blur, or numbered step markers before sharing.
- Open the destination app. Navigate to the Slack thread, email draft, task, document, or browser upload field.
- Drag the screenshot into the target. Drag from the screenshot preview, editor, or recent-capture area and drop it where attachments are accepted.
- Add a short explanation. A screenshot should support the message, not replace it. State the issue, requested action, or expected outcome.
In many Mac apps, a successful drop displays a thumbnail, upload progress indicator, or attachment preview. Wait for the upload to finish before sending your message or closing the screenshot tool.
Annotate Before You Drag
A raw screenshot often makes the recipient work too hard. They may not know where to look, what changed, or what action you expect. Lightweight screenshot annotation turns a captured display into a focused visual instruction.
Use arrows for immediate direction
An arrow is the fastest way to point at a button, field, icon, or error message. Keep arrows short and avoid crossing multiple areas of the screen. If there are several arrows, use consistent colors and make sure each one clearly ends at its target.
Use shapes to define an area
Rectangles, circles, and highlights are useful when the whole region matters rather than one tiny point. For example, a rectangle can identify an entire settings section, while a circle can call out a status indicator. Semi-transparent fills can work well when the interface is visually dense.
Use text only when it adds meaning
Text labels are helpful for clarifying what an annotation means: “Expected result,” “This menu is missing,” or “Use this option.” Keep labels brief. A long paragraph inside a screenshot is harder to scan and is often better written in the accompanying message.
Use numbered steps for sequences
Numbered step markers are particularly useful for tutorials, QA reports, onboarding instructions, and support replies. They make the intended order unmistakable. Pair them with a short list in the message, such as:
1. Open Account Settings.
2. Select Notifications.
3. Enable Weekly Summary.
4. Save changes.
This combination makes it easy for the recipient to follow the visual path without guessing which control comes first.
Blur information instead of hiding the screenshot’s context
Blurring is essential when a screenshot includes private customer details, email addresses, order numbers, internal URLs, API keys, or financial information. Blur only what is sensitive. Excessive redaction can make a screenshot confusing, while careful blur preserves enough context for the recipient to understand the issue.
Where You Can Drag a Screenshot on Mac
Most modern Mac applications accept image files through drag and drop. The behavior may vary slightly, but the workflow is broadly similar across communication, documentation, and productivity tools.
| Destination | Typical Use | Helpful Tip |
|---|---|---|
| Slack or Microsoft Teams | Bug reports, quick feedback, team questions | Drop into the correct thread to preserve context. |
| Mail or Gmail | Support replies, client updates, approvals | Add alt-like descriptive text in the email body. |
| Notion, Google Docs, or Confluence | Documentation and tutorials | Use a caption below the image for searchable context. |
| Linear, Jira, Asana, or Trello | Issue tracking and task handoffs | Include reproduction steps alongside the screenshot. |
| Browser upload fields | Forms, CMS uploads, feedback portals | Confirm the upload has completed before navigating away. |
| Messages | Fast internal or personal communication | Crop or blur first, since messages are easy to send quickly. |
Write Better Bug Reports With Full-Screen Screenshots
A screenshot alone is evidence, not a complete bug report. For reliable handoffs, pair the image with concise written context. Full-screen captures can be especially helpful because they preserve environmental details, such as the active page, browser state, and visible controls.
Use this simple structure:
- What happened: Describe the visible problem.
- What you expected: State the intended behavior.
- How to reproduce it: List the minimum steps.
- Where it happened: Include the app, page, device, or relevant environment.
- Screenshot: Point to the annotation that shows the key evidence.
Example: “After selecting Save, the confirmation banner overlaps the navigation menu. Expected: the banner should appear below the header. See the red box in the attached full-screen screenshot.”
This format gives developers, designers, or support teams both the visual proof and the context needed to investigate quickly.
Common Drag-and-Drop Problems and Fixes
If dragging a screenshot does not work, the issue is often related to the destination app rather than the capture itself. Try these practical checks:
- The drop zone is not active: Click into the message field or attachment area first, then drag again.
- The app does not accept direct drops: Use its upload button, or drag the image to the desktop temporarily and select it from Finder.
- The screenshot preview disappears too soon: Use a screenshot app with recent capture history or save the image before switching apps.
- The file is too large: Crop unnecessary areas, reduce image dimensions, or use a compressed format if supported.
- The wrong monitor was captured: Verify the selected display before capture, especially in multi-monitor setups.
- Private data is visible: Return to the editor and blur or crop it before dropping the image.
Choose a Workflow That Keeps Screenshots Under Control
The best full-screen capture workflow is not necessarily the one with the most features. It is the one that lets you capture, mark up, and deliver an image without creating clutter or sacrificing privacy. Look for quick region and full-display capture, a clear annotation editor, drag-and-drop output, accessible recent history, and controls over where images are stored or shared.
For people who prefer a local-first Mac workflow, tools such as Snip Halo can keep captures on the device by default while providing optional sharing when it is actually needed. Whatever tool you choose, establish a repeatable habit: capture the right context, annotate only what matters, remove sensitive details, drag into the destination, and include one clear sentence explaining the image.
That small workflow change makes screenshots more than static files. They become fast, precise pieces of visual communication that help work move forward.
